Milesight UG65
Registration and Configuration
If you have not done so already you will need to register your gateway through your Developer or RAN Provider account using the steps below.
This page shows examples from a UG65 model Base Station running firmware v60.0.0.36 and may be a helpful reference to other models in the same series. Similiar models include UG67 and UG63.
Note
Download the latest firmware images for all models directly: Milesight Software Download
Prerequisite Registration Information
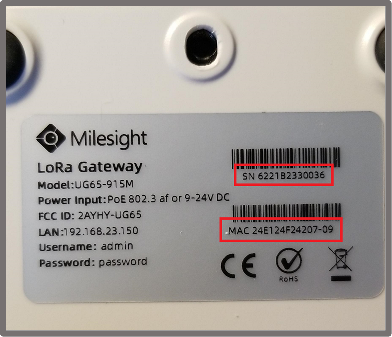
The Manufacturer EUI can be derived from the listed 'MAC' value. The Serial Number ('SN') and 'MAC' values can be found on the label located on the back of the Milesight UG65.
Note
To obtain the Manufacturer (Base Station) EUI from the listed 'MAC' value do the following:
| Step | Instruction | Example |
|---|---|---|
| 1. | Note the listed 'MAC' value. | 24E124F24207-09 |
| 2. | Delete the dash and any characters to the right of the dash. | 24E124F24207 |
| 3. | Insert characters 'FFFE' in-between the 6th and 7th characters from the left. | 24E124 FFFE F24207 |
| 4. | Ensure there are no spaces and verify your final value has a length of 16 characters. | 24E124FFFEF24207 |
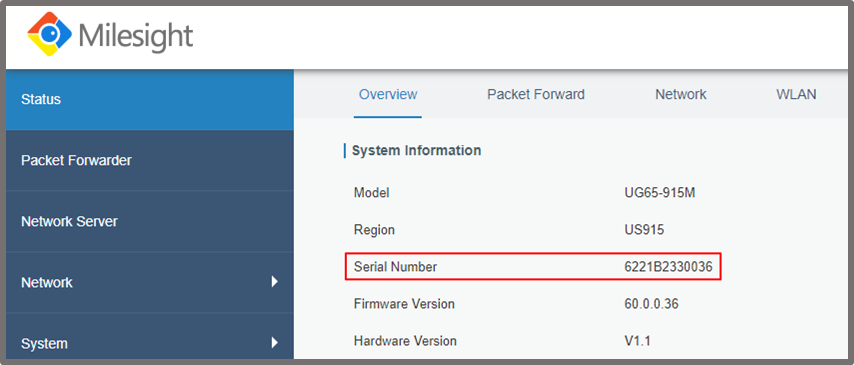
Alternatively, the SN and Manufacturer EUI can be found in the Milesight Configuration web interface. For access instructions, see corresponding section below.
- The Serial Number can be found by navigating to section
Status > Overview > Serial Number
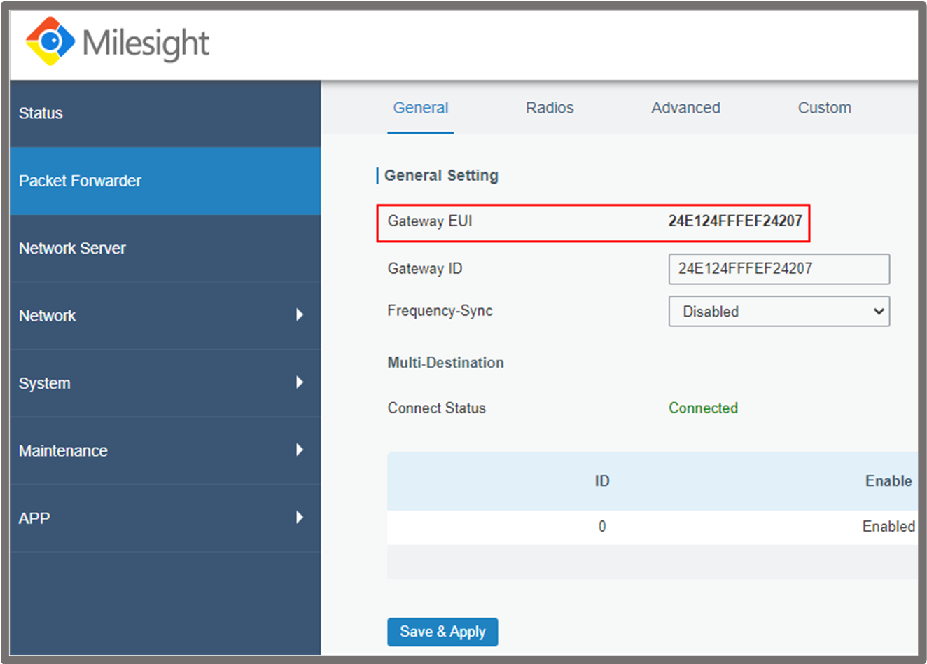
- The full Manufacturer (Base Station) EUI value can be found by navigating to section
Packet Forwarder > General > Gateway EUI
Registration on the Netmore network
Once the Manufacturer EUI and Base Station SN have been acquired, return to the Netmore Portal and complete Registration.
Note
Users with a free Developer Account can find supplemental information using the following link: Generic Developer Gateway Registration Users registered as RAN Providers can find supplemental information using the following link: Generic RAN Provider Gateway Registration
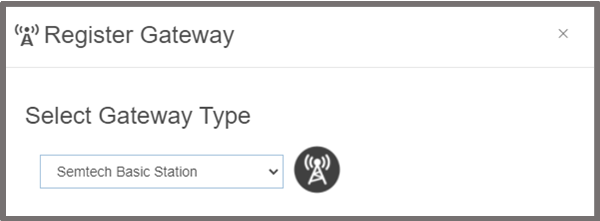
- Using any user account type with access to Base Station registration capabilities; when asked to Select Base Station Type during registration on the Netmore Portal, choose the
Semtech Basic Stationoption from the drop down menu.
- Enter the unique SN and Manufacturer EUI as required.
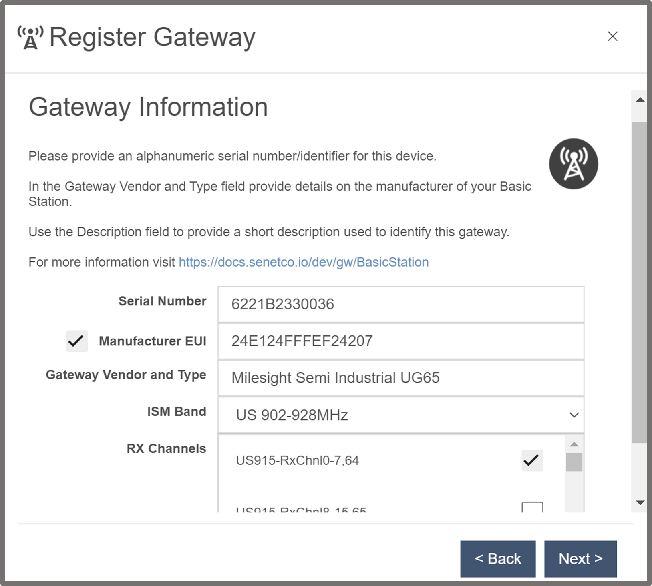
- Complete the registration process by filling in the remaining fields.
Note
The Milesight UG65 supports a maximum of 8 channels at any given time. During registration you will have a chance to select which sub-band of 8 RX Channels the Base Station should operate on to start. Tip: After registration is complete, you can use the Netmore Portal to reconfigure the RX Channel sub-band without the need to login to the Milesight Configuration web interface.
Milesight Configuration Web Interface Initial Access Instructions
There are two methods to connect to the UG65 Base Station locally for configuration purposes:
1. Wireless (Wi-Fi) 2. Wired (Ethernet)
Each interface has a unique default static IP hosting the Milesight Configuration web interface. In this instruction set we show the wireless access method.
Note
For more information, please refer to the Milesight Official UG65 Quick Start PDF
All users will be required to obtain initial access locally in order to configure a network backhaul interface and LoRaWAN Packet Forwarding to communicate with the Netmore Network Server.
Wireless (Wi-Fi) Local Connection
- Enable the Wireless Network Connection on your computer.
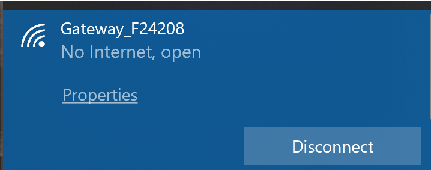
- Search for the advertised Wireless Access Point (WAP) named
Gateway_******where******are the last 6 characters of your Base Station's MAC address.
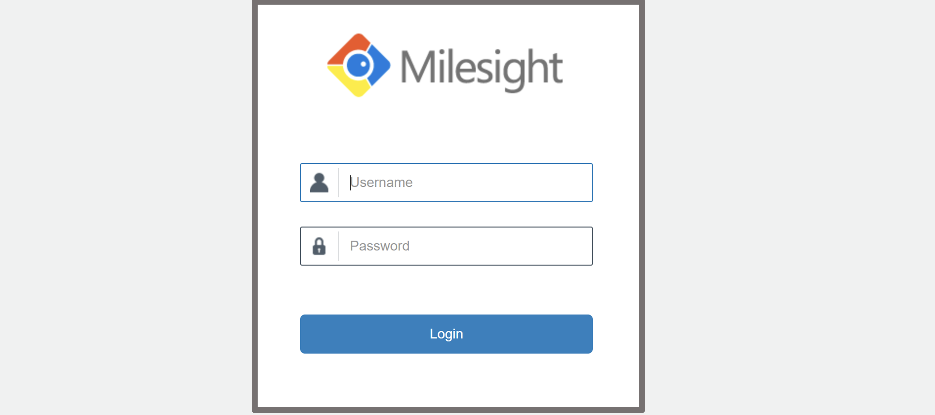
Open a web browser on your PC (Chrome is preferred) and navigate to the appropriate IP address. The default IP address and Username/Password for the wireless interface are listed below:
| Interface | Default Static IP | Default Username | Default Password |
|---|---|---|---|
| Wireless (Wi-Fi) | http://192.168.1.1 | admin | password |
Enter the default username and password as listed above, then click Login:
During the initial setup you will be prompted through two configuration menus: 1. Select the antenna type for your device (Internal or External) 2. Change the default password
WAN Backhaul Configuration
Configuring a backhaul connection to the Internet is a prerequisite to enable the Base Station to be remotely accessible and to forward traffic to the Netmore Network Server. In this instruction set, the wired backhaul interface is configured through the static wireless default interface.
Configuring an interface for backhaul operation as described in this section will modify how the device functions: 1. A correctly configured backhaul interface will enable the Base Station to communicate with Netmore. 2. The ability to connect to the default static IP address of the corresponding interface will be disabled.
Warning
Be aware that if both the wireless and wired interfaces are configured incorrectly it may become extremely difficult to recover access to the Base Station. It is recommended to complete Netmore registration, Basic Station configuration, and verify connectivity through the Netmore Portal prior to configuring both interfaces for concurrent backhaul operation.
The Base Station will be accessible remotely through the web interface following a successful backhaul configuration and connection. In addition to Wi-Fi and Ethernet backhauls, the Base Station can also be configured for cellular backhaul operation.
Note
For more information, please refer to the Milesight Official UG65 Quick Start PDF
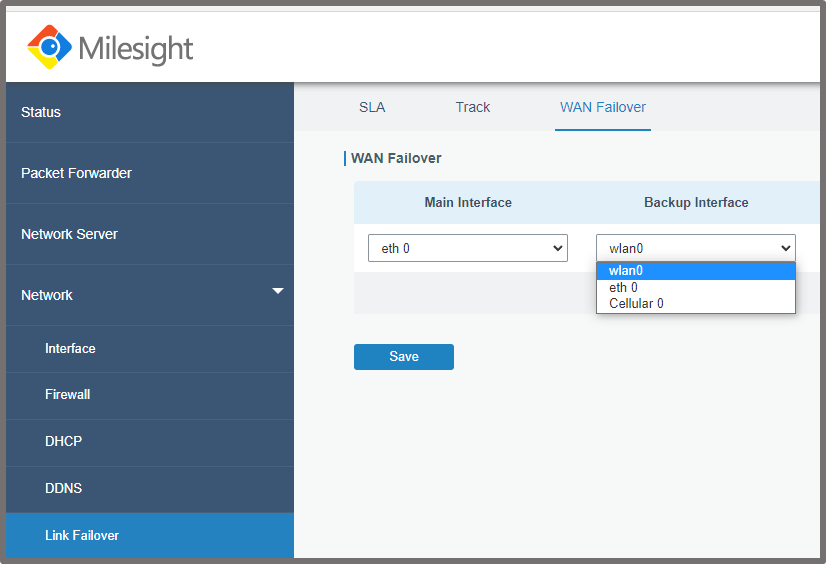
One additional backhaul interface can be configured so that in the event the main interface has a failure, the second backhaul connection will be utilized.
- To specify the main and backup interfaces, navigate to
Network > Link Failover > WAN Failover.
Note
During the initial backhaul configuration process, it's recommended to use an alternate interface than the one to be provisioned, if available. For example, if planning to provision the Base Station to operate as wired, its recommended to access the Base Station through the wireless local interface. In this way, newly assigned DHCP IP addresses can be found through the Milesight Configuration web interface. Otherwise, in the event an alternate interface isn't available and the interface to be provisioned for backhaul must be used for local access configuration as well; after DHCP settings are saved and Base Station is connected to wired network, a network administrator with access to the DHCP assignment table should be able to find the address if provided with the Base Station MAC address.
Wired (Ethernet) WAN Backhaul Configuration
If you are using the default wired local connection address (192.168.23.150), you will need to reconnect to the new configured address following making these changes.
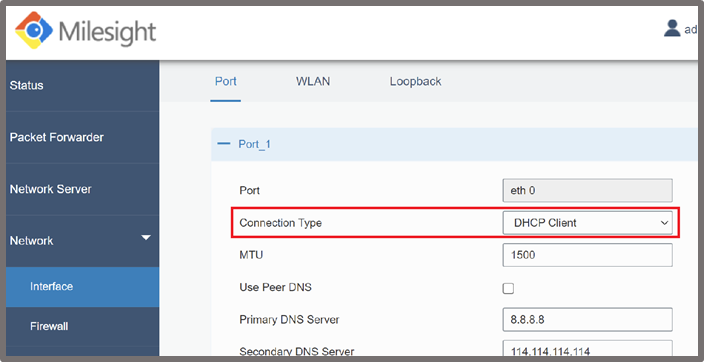
- Through the Milesight Configuration web interface, navigate to:
Network > Interface > Port. - In the
Connection Typedrop down menu, select eitherStatic IPorDHCP Client.
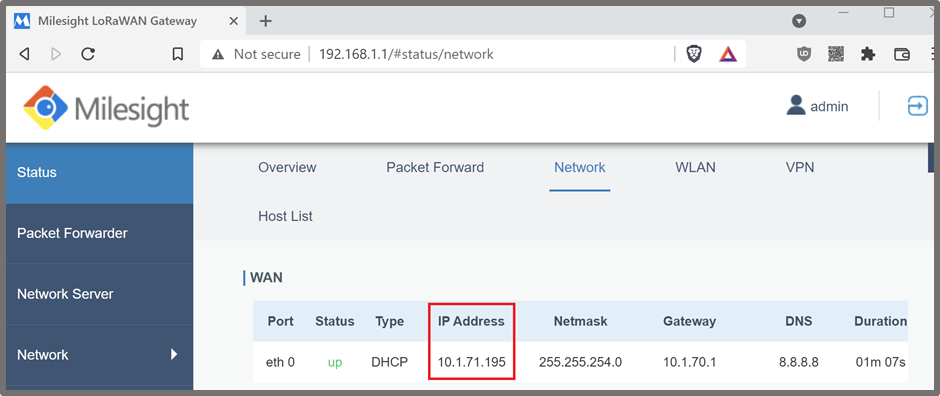
Note
You can find the DHCP IP address assigned to the wired interface if connected through the wireless local connection by navigating to Status > Network.
Configuring Semtech Basic Station
- Verify the Base Station has a valid network backhaul and the Registration process is completed in the Netmore Portal.
-
Return to the Milesight Configuration web interface to configure the Base Station packet forwarding software.
-
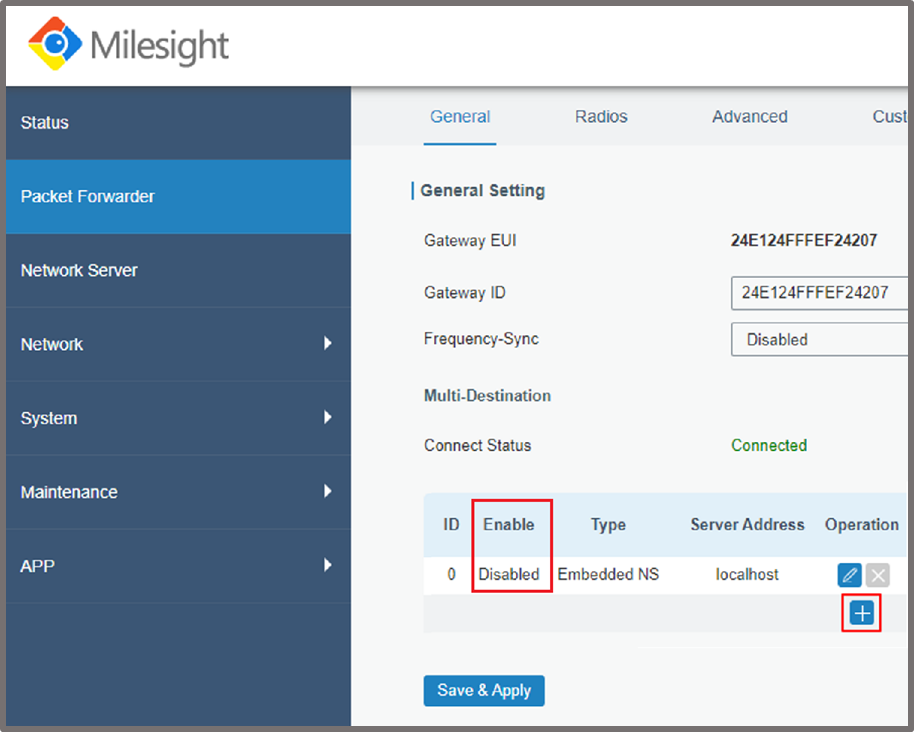
To configure the Semtech Basic Station packet forwarding software, navigate to:
Packet Forwarder > General. - Disable all currently active packet forwarder(s) by selecting the
Editbutton denoted by the pen icon under theOperationcolumn.
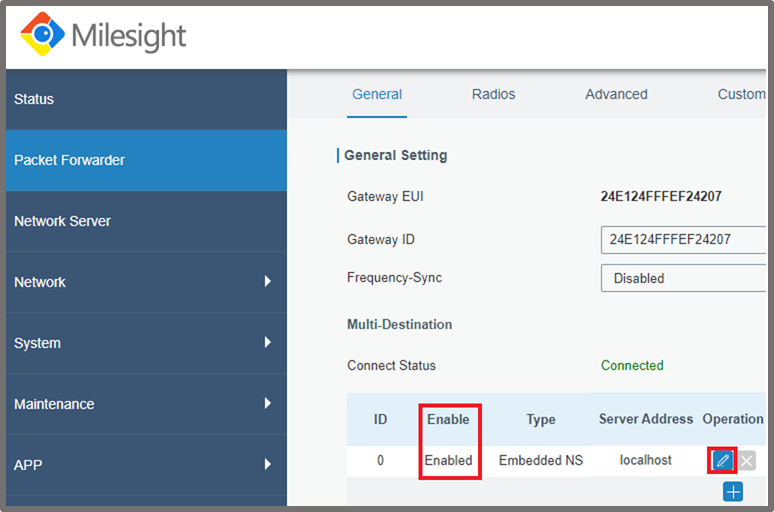
- A new window will be displayed, shown below. Disable the packet forwarder by removing the checkmark in-line with
Enable.

-
Ensure that all listed Packet Forwarder(s) are Disabled.
-
Click the
+icon under theOperationcolumn to add a new packet forwarder.
- Ensure the
Enablecheckbox is filled in. - In the
Typedrop down menu, select the optionBasic Station, the window will expand to show more fields.
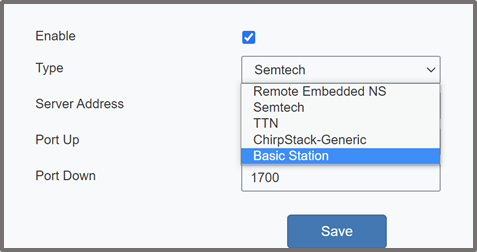
Note
Additional information regarding Basic Station can be found at the following link: Generic Semtech Basic Station
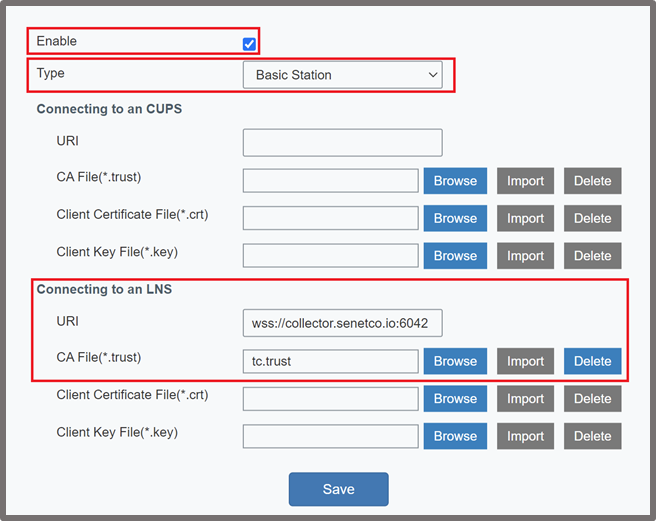
In the newly expanded window, configure the Connecting to an LNS section as follows (TLS secured recommended configuration):
- URI:
wss://ns-gw.lns.netmoregroup.com:6042 - CA File(*.trust): Download the Netmore TLS Server Certificate
- Save the tc.trust file locally, note the location.
- Use the
Browsebutton to open a file directory window, then navigate to your saved version of tc.trust. - Click the
Importbutton, which should now be blue if the correct file type was selected. - A successful
Importis recognizable by theDeletebutton changing color to become blue. - Close the window by clicking
Save.
- Click the button labeled
Save & Applyfor your changes to take effect.
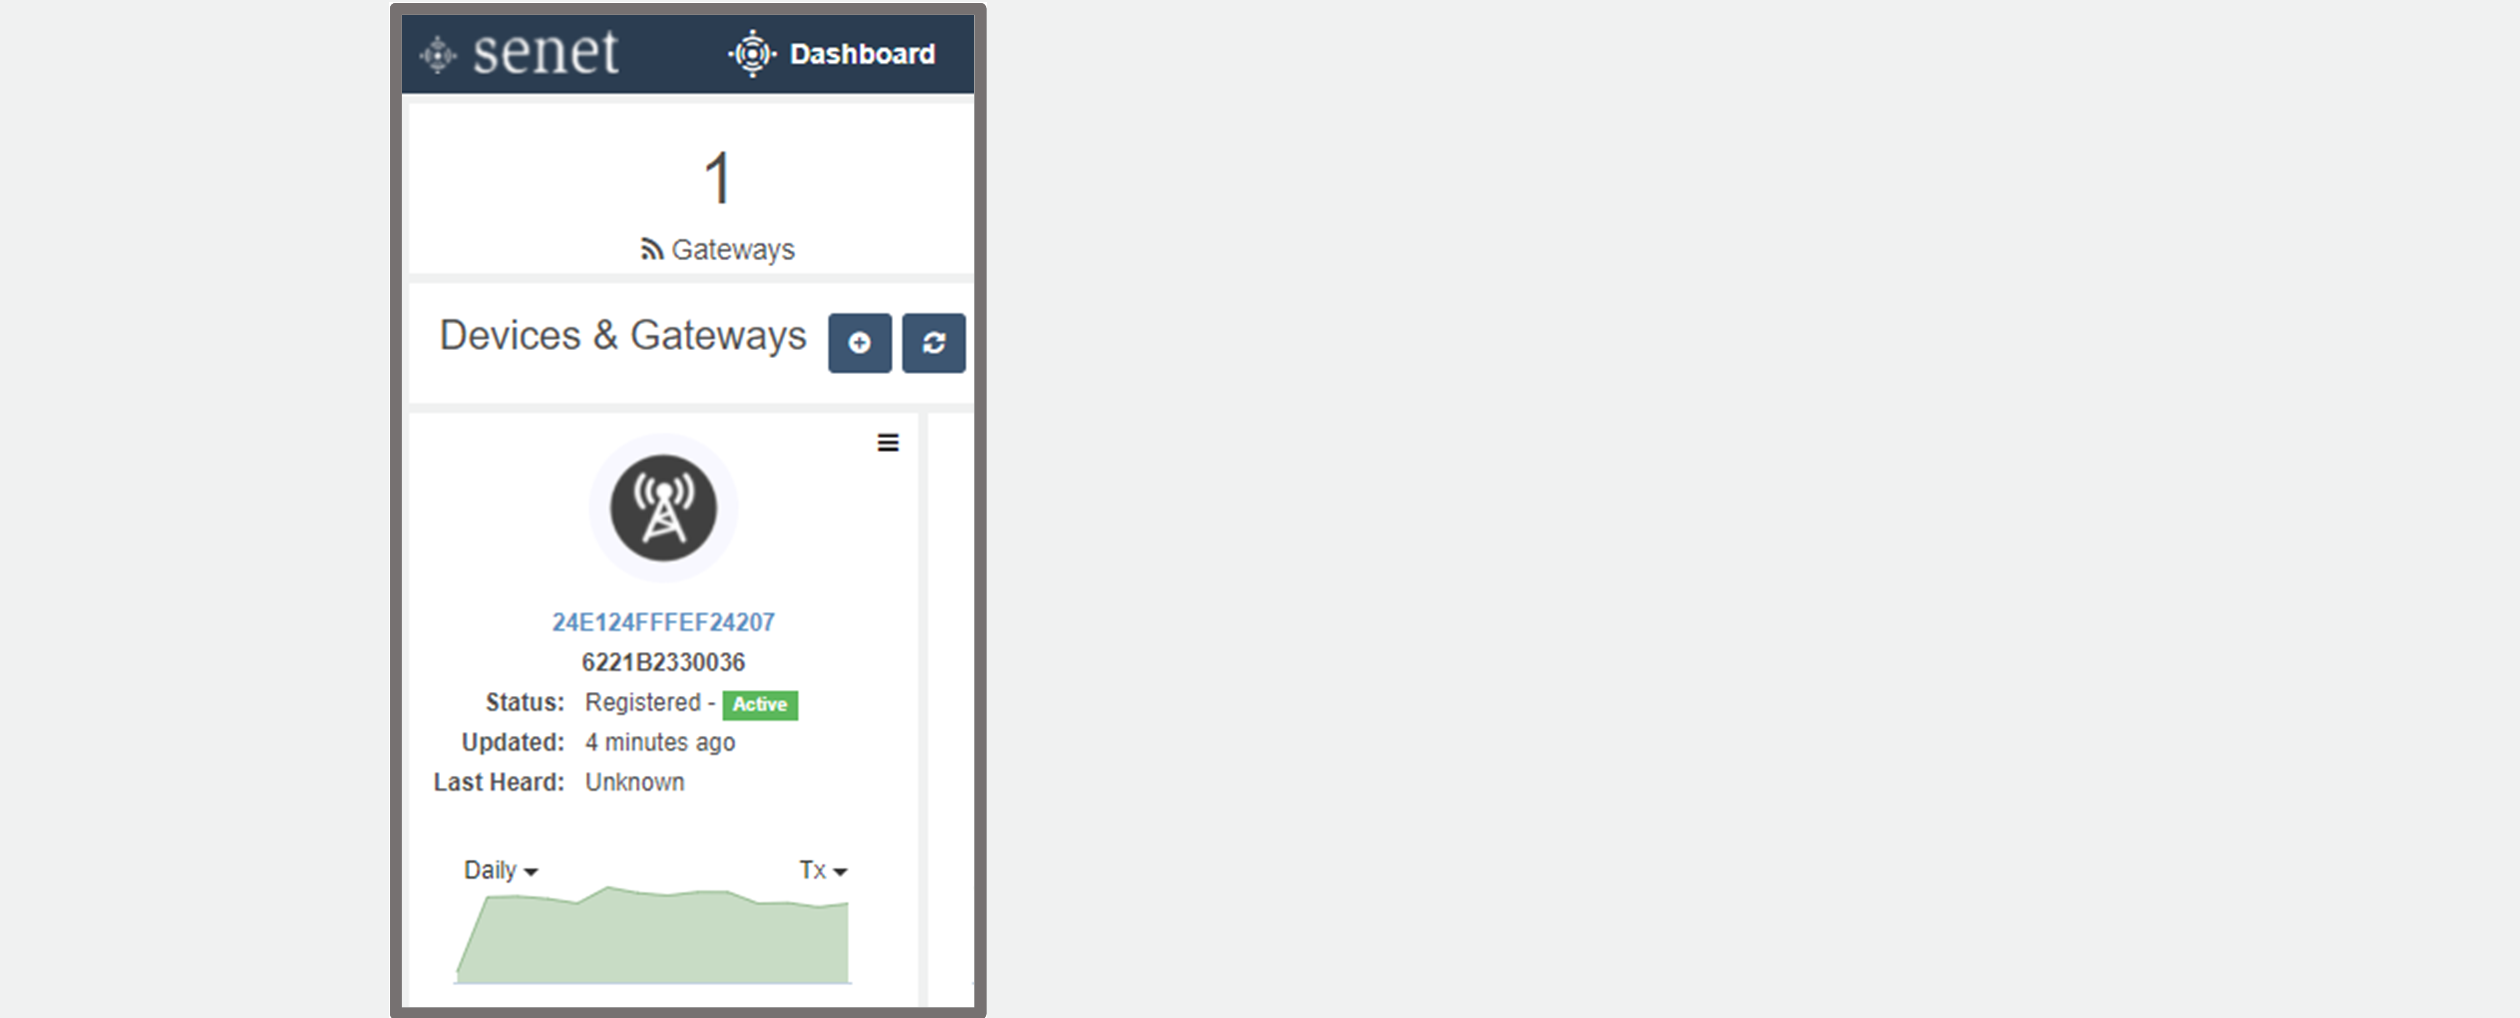
Verifying Connection to the Netmore Network
Upon successful completion, the Base Station status will update to Registered - Active