Peplink Balance 20X (with FlexModule Mini)
Note
The Balance 20X SD-WAN router and the LoRaWAN FlexModule Mini are sold separately.
Registration and Configuration
If you have not done so already you will need to register your Base Station through your Developer or RAN Provider account using the steps below.
System Requirements
LoRaWAN functionality (via FlexModule Mini) on the Balance 20X SD-WAN router was introduced in firmware (FW) version 8.3.0.
| Model | Supported FW Versions |
|---|---|
| Balance 20X SD-WAN router | 8.3.0+ |
| Model | Product Code | Supported Frequency Bands |
|---|---|---|
| LoRaWAN FlexModule Mini | EXM-MINI-LORA | US915, AU915, AS923, AS925, KR920 |
| LoRaWAN FlexModule Mini | EXM-MINI-LORA-EU | EU868, IN865, RU864 |
Note
Download the latest firmware images directly: Peplink Base Station Firmware For more information, please refer to the Peplink LoRaWAN Datasheet
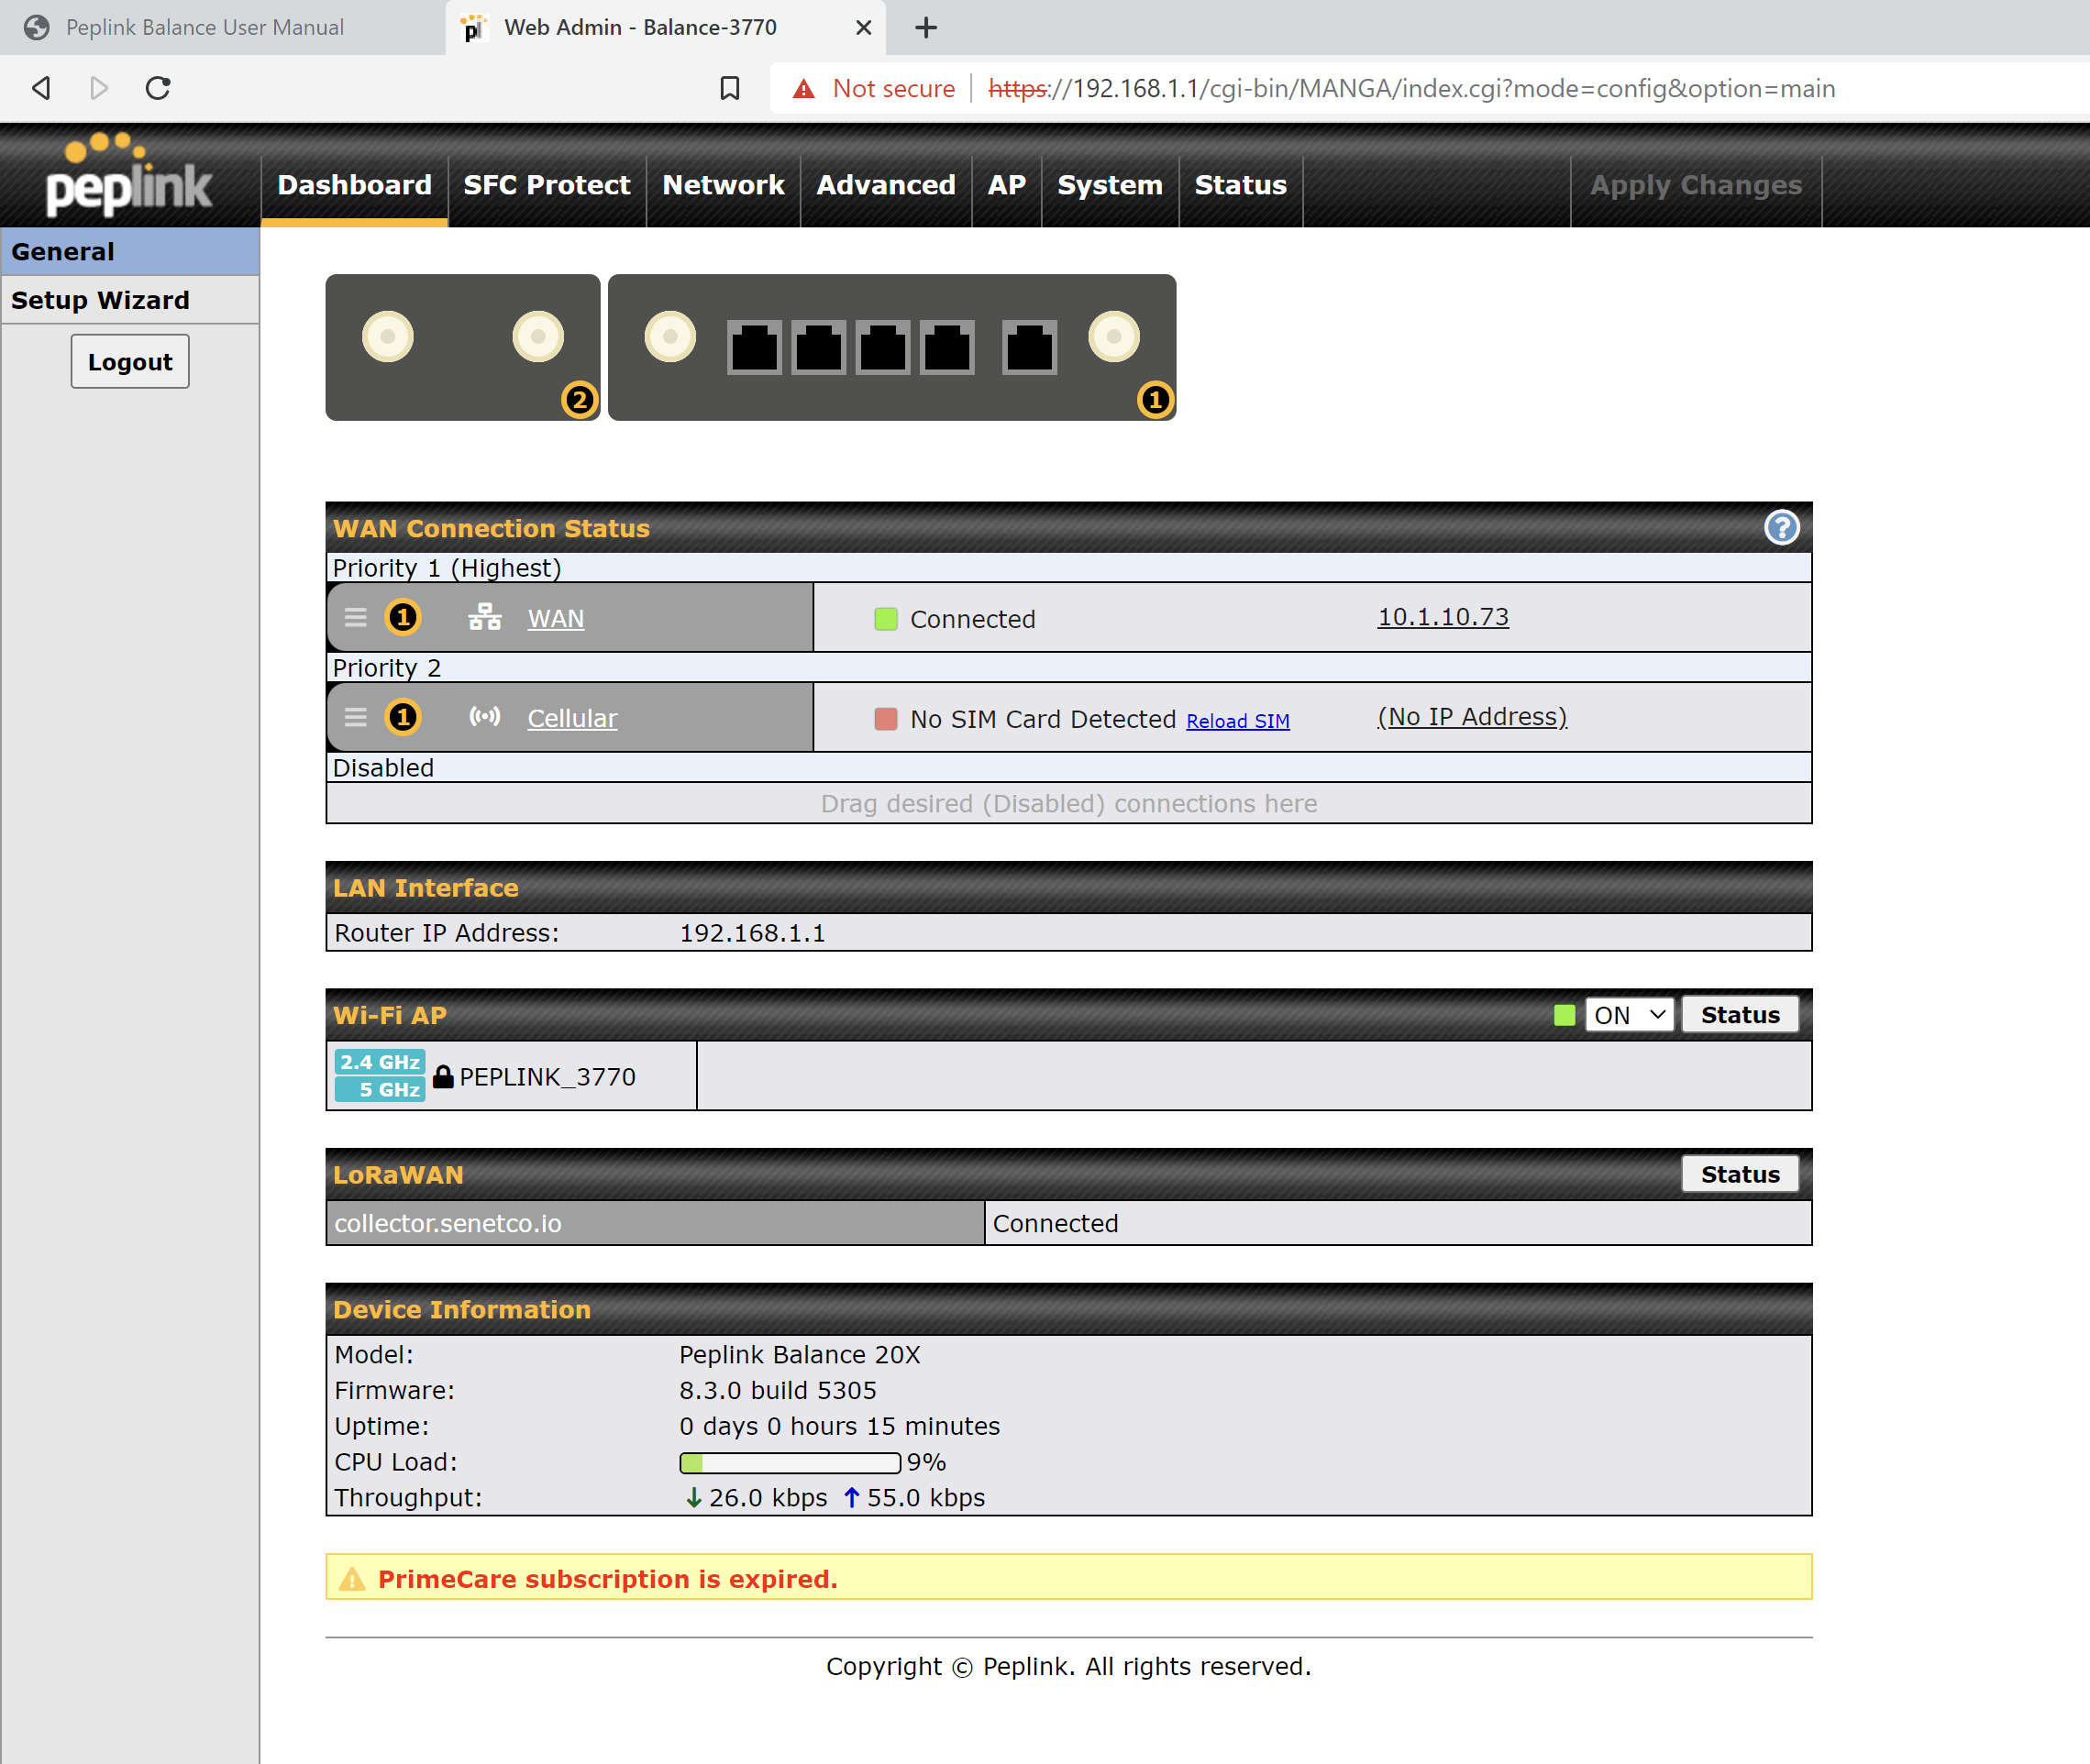
- Verify the current FW version by navigating to
Dashboard > Device Information > Firmware.
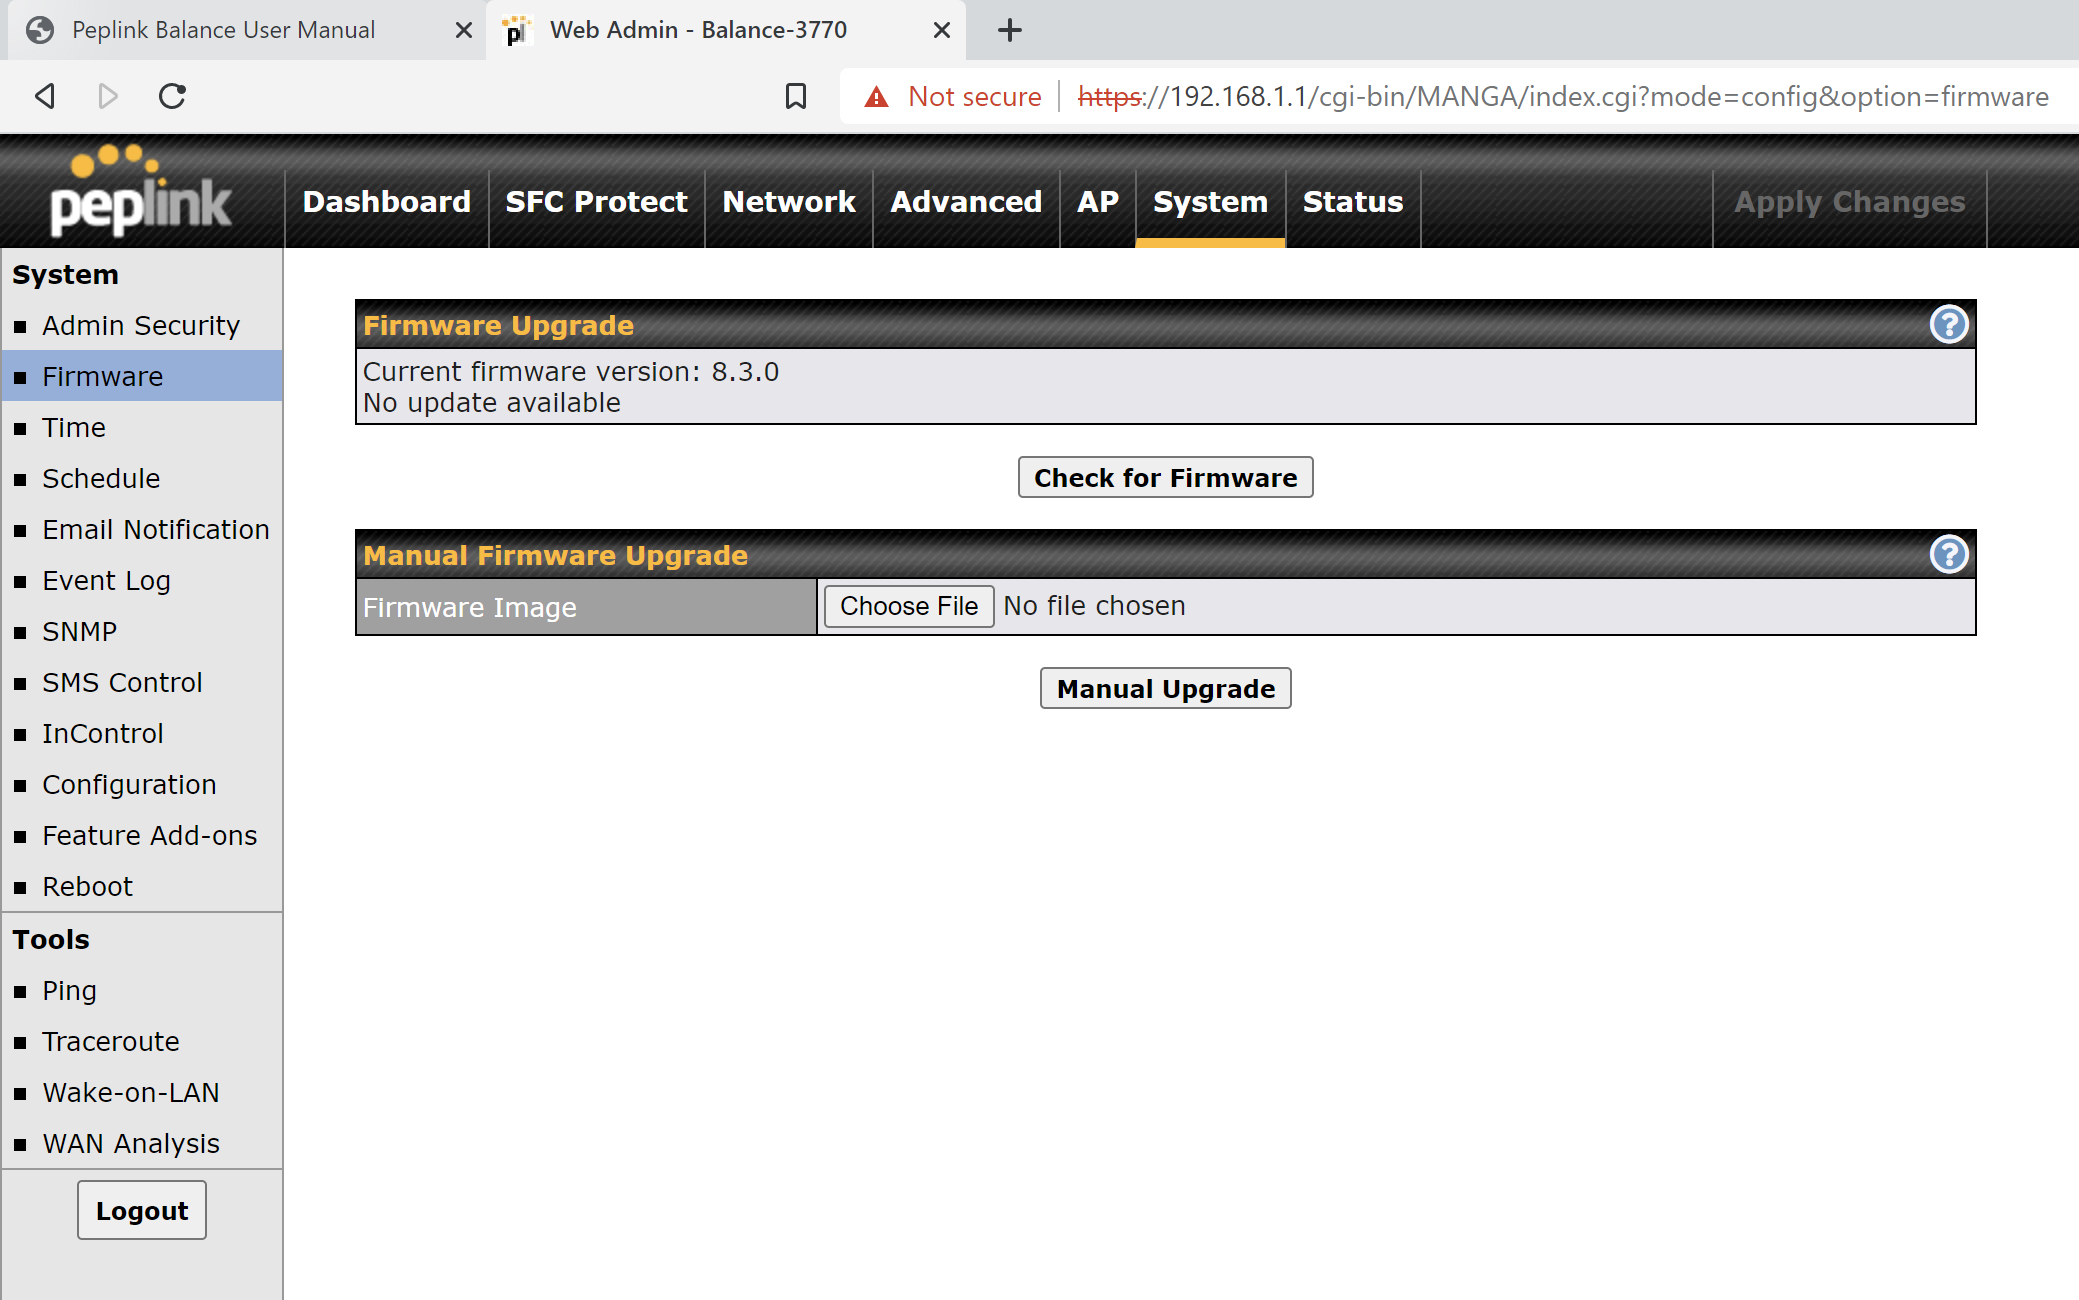
- Check for new FW, or provide a file for manual upgrade by navigating to
System > Firmware.
Prerequisite Registration Information
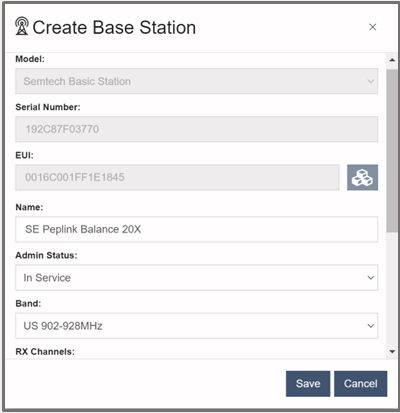
The following information is required to register the Base Station in the Netmore portal: 1. Manufacturer (Gateway) EUI 2. Serial Number ('SN')
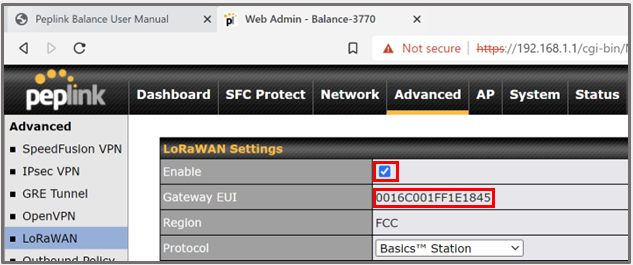
The Manufacturer (Gateway) EUI value can be found within the Peplink Web Admin Interface under Advanced > LoRaWAN > LoRaWAN Settings > Gateway EUI. For access instructions, see corresponding section below.
Note
The Enable checkbox must be checked before the Gateway EUI will be displayed.
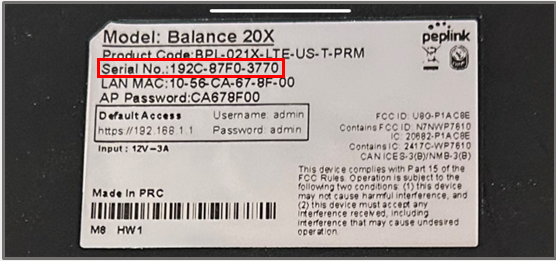
The SN value can be found on the label located on the back of the Peplink Base Station.
Alternatively, the SN is listed in the Peplink Web Admin Interface under Status > Device > System Information > Serial Number
Warning
Remove all - characters from the listed serial number in order to make it compatible with Netmore's registration process.
| Step | Instruction | Example |
|---|---|---|
| 1. | Note the listed 'Serial No.' value. | 192C-87F0-3770 |
| 2. | Remove all '-' characters. | 192C87F03770 |
Registration on the Netmore network
Once the Manufacturer EUI and Base Station SN have been acquired, return to the Netmore Portal and complete Registration.
Note
Users with a free Developer Account can find supplemental information using the following link: Generic Developer Gateway Registration Users registered as RAN Providers can find supplemental information using the following link: Generic RAN Provider Gateway Registration
- Using any user account type with access to Base Station registration capabilities; when asked to Select Base Station Type during registration on the Netmore Portal, choose the
Semtech Basic Stationoption from the drop down menu.
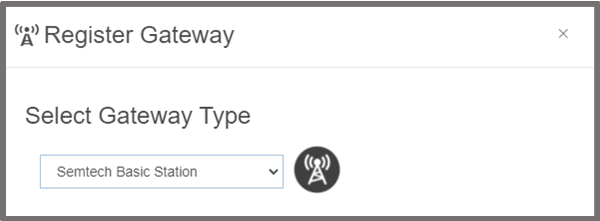
- Enter the unique SN and Manufacturer EUI as required.
- Complete the registration process by filling in the remaining fields.
Note
The Peplink Base Station supports a maximum of 8 channels at any given time. During registration you will have a chance to select which sub-band of 8 RX Channels the Base Station should operate on to start. Tip: After registration is complete, you can use the Netmore Portal to reconfigure the RX Channel sub-band without the need to login to the Peplink Web Admin Interface (don't forget the power cycle the Basic Station!)
Initial Access Instructions
Connect to the Peplink Web Admin Interface via LAN for initial configuration.
A summary of the default characteristics for each interface is provided below:
| Interface | Default Static IP | Default Username | Default Password | Interface Password |
|---|---|---|---|---|
| Wireless (Wi-Fi) | https://192.186.1.1 | admin | admin | unique 'AP Password' on label |
Note
For more information, please refer to the Peplink User Manual PDF and/or the Peplink LoRaWAN Configuration Manual
Wireless (Wi-Fi) Local Connection
- Enable the Wireless Network Connection on your computer.
- Search for the advertised Wireless Access Point (WAP) named
Peplink_****where****are the last 4 characters of the Base Station's SN. - Connect to the Wi-Fi AP using the WAP Interface Password found on the back label of the Base Station.
- Enter the default username
adminand passwordadminas listed above, then click Login. - After logging in for the first time, Peplink requires the user to change the default Base Station password and the Wi-Fi AP Interface Password immediately.
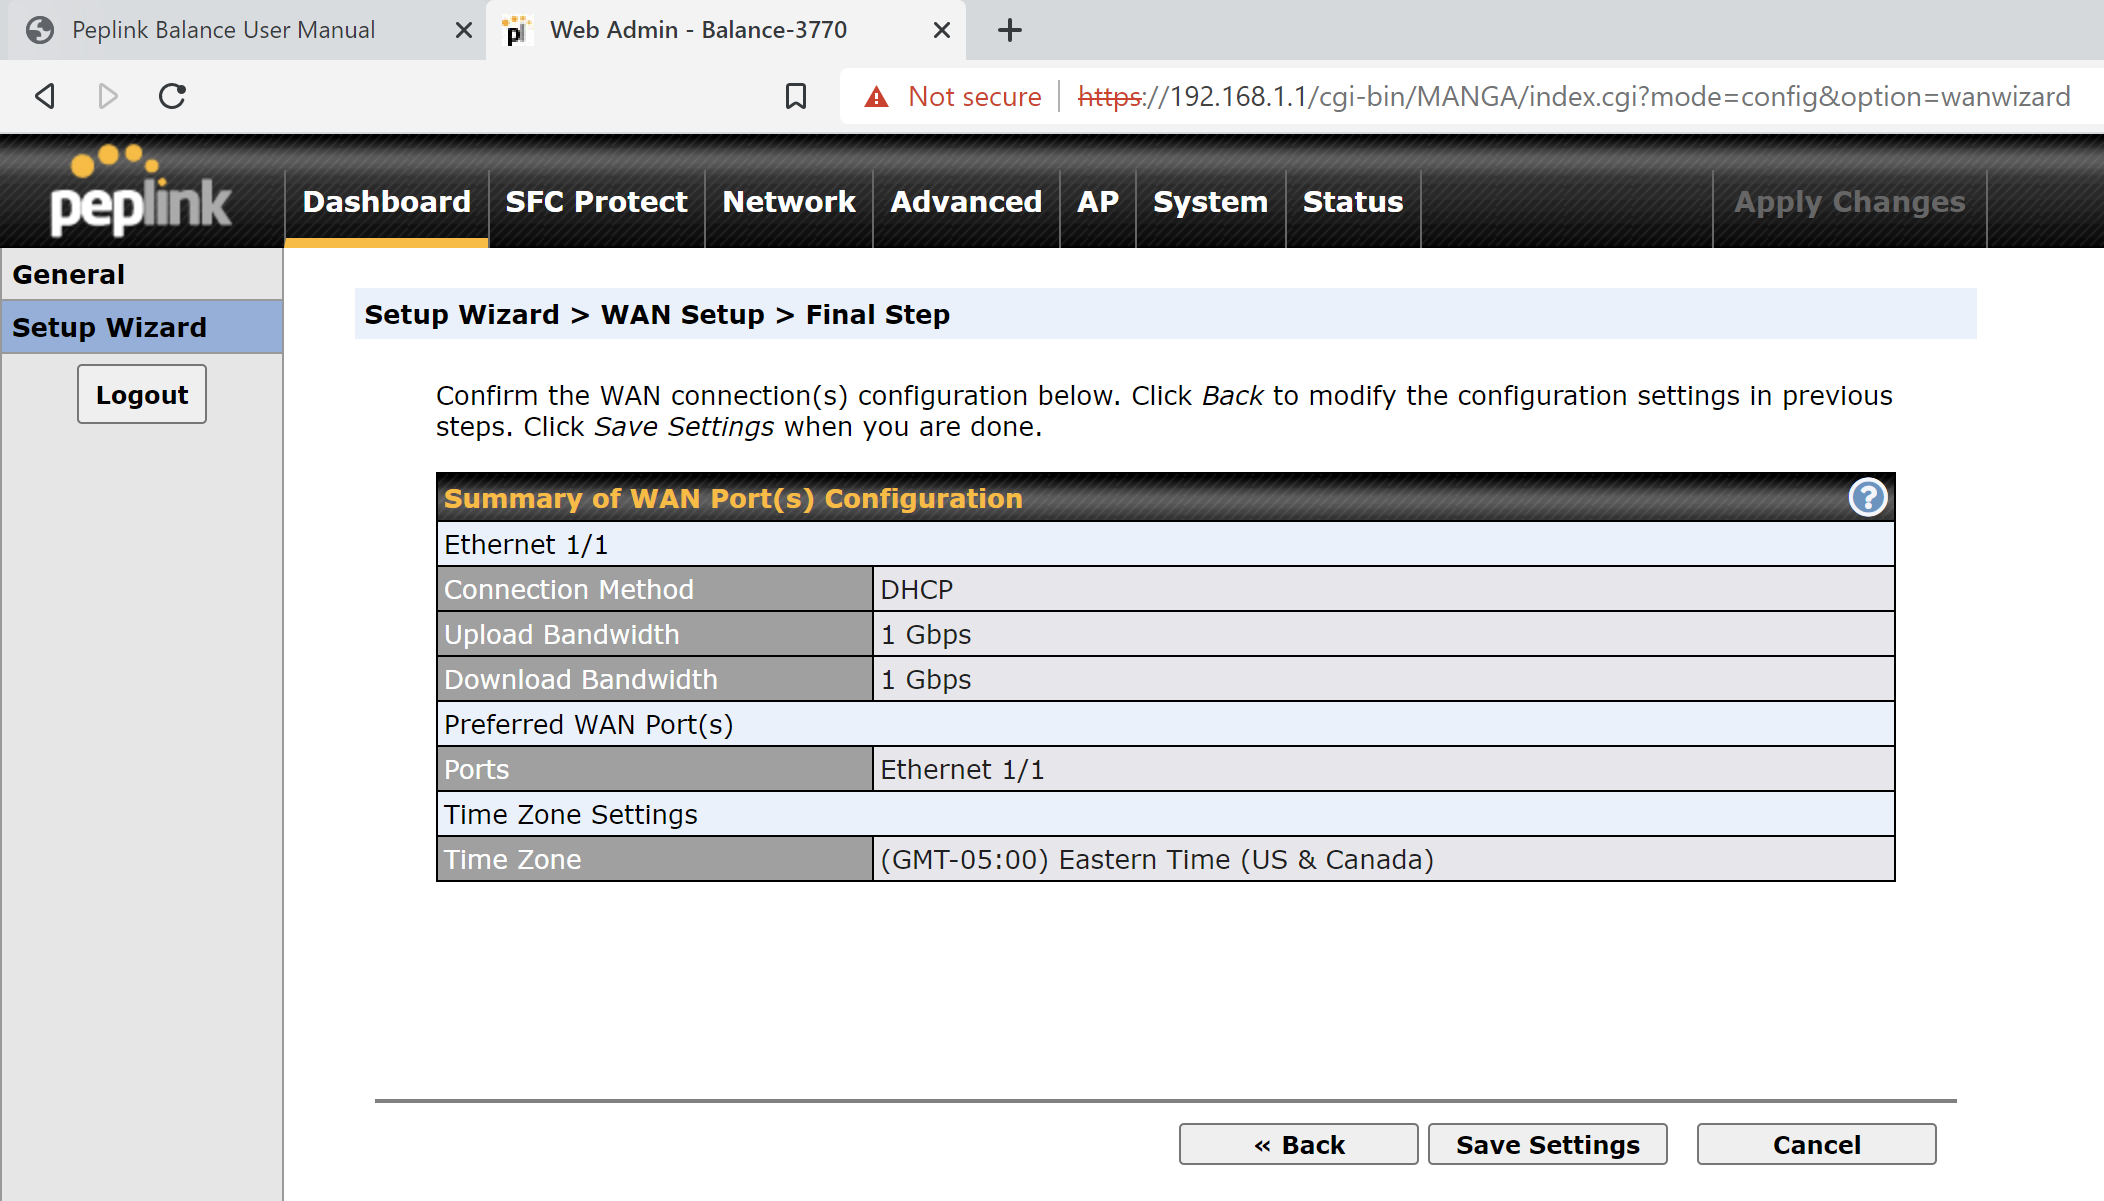
- Complete the Setup Wizard, contact your local network admin if you need assistance.
- On the final step of the Setup Wizard, press
Save Settings - Press
Apply Changes
WAN Backhaul Configuration
Configuring a backhaul connection to the Internet is a prerequisite to enable the Base Station to be remotely accessible and to forward traffic to the Netmore Network Server. In this instruction set, the wired backhaul interface is configured through the static wireless default interface during the Setup Wizard process.
Wired (Ethernet) WAN Backhaul Configuration
- If needed, you can use the Setup Wizard again at any time to configure the Base Station backhaul interface depending on unique deployment requirments.
Note
You can find the DHCP IP address assigned to the Base Station by navigating to Dashboard > WAN Connection Status > WAN.
Configuring LoRaWAN Packet Forwarder as a Semtech Basic Station
- Verify the Base Station has a valid network backhaul and the Registration process is completed in the Netmore Portal.
- Navigate to the
Advanced > LoRaWAN > LoRaWAN Settingsmenu.
Netmore LNS URI
The Netmore LNS protocol can be configured in two different ways: 1. Secured (Recommended) 2. Unsecured (Debugging and development purposes)
Note
Additional information regarding Basic Station can be found at the following link: Generic Semtech Basic Station
Secured LNS URI (Recommended)
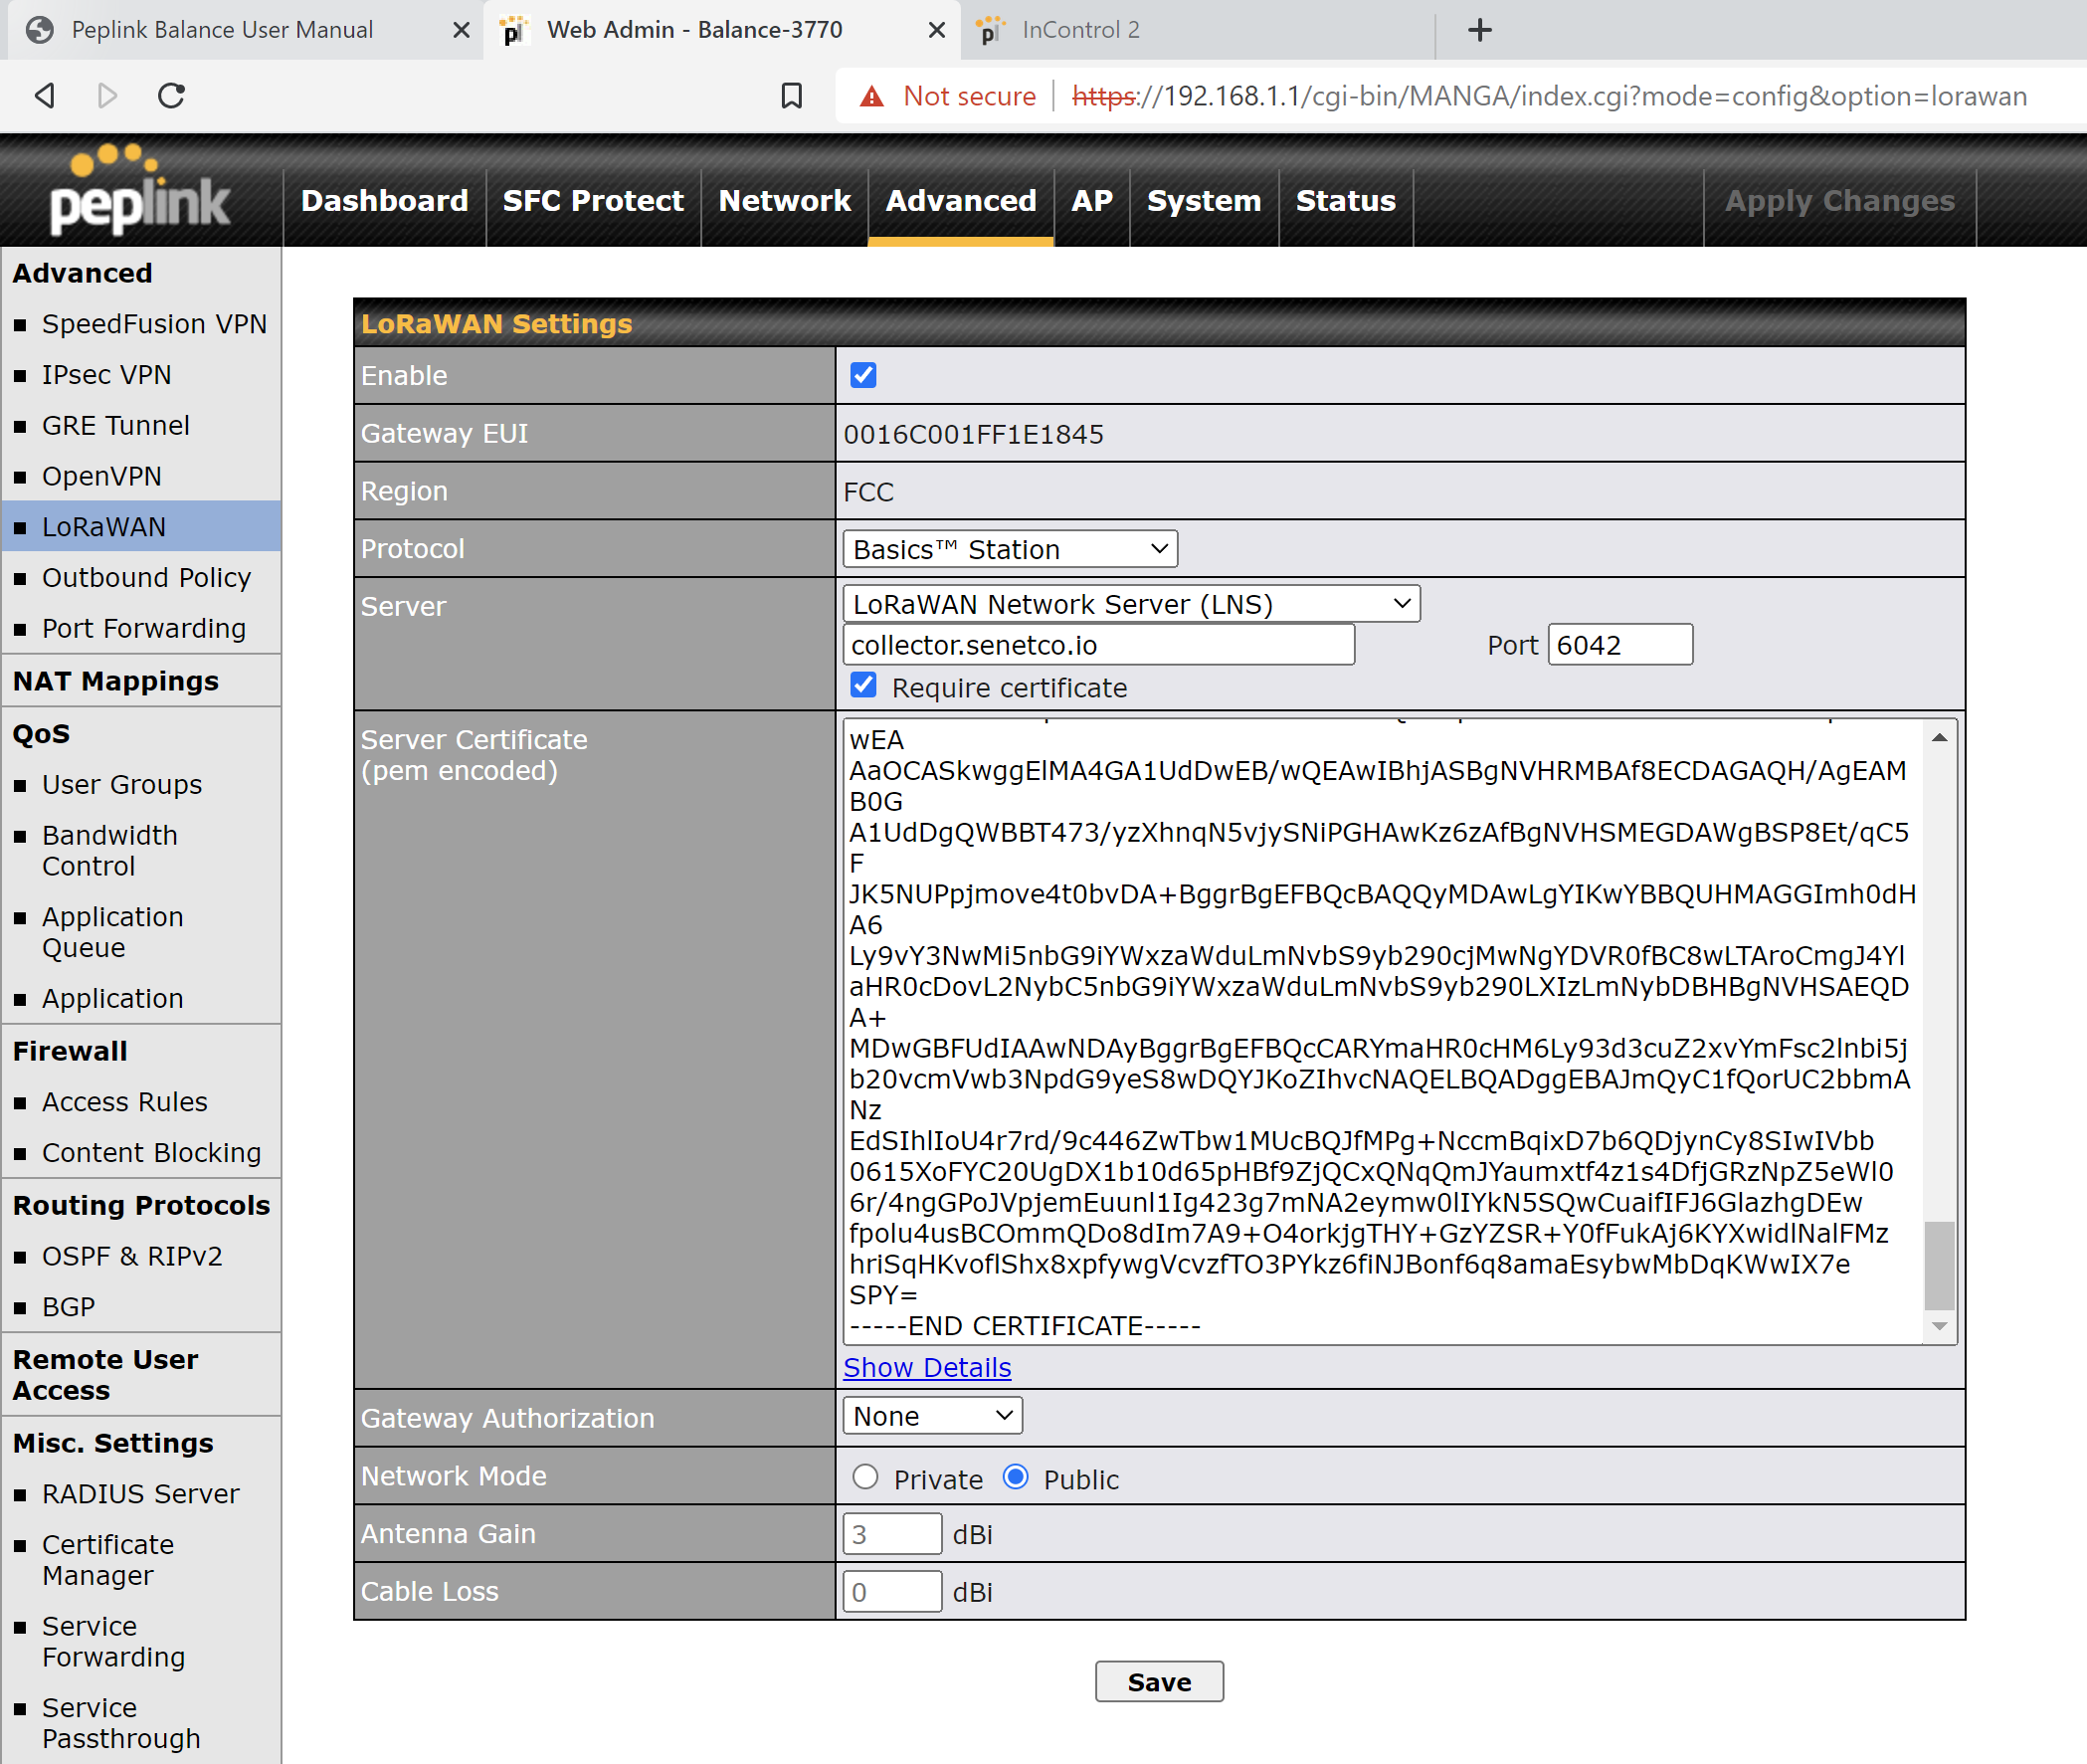
- Check the
Enablecheckbox. - A new section will appear under
LoRaWAN Settings. - Select
Basics Stationfrom the Protocol drop down menu. - Select
LoRaWAN Network Server (LNS)from the Server drop down menu. - Enter
ns-gw.lns.netmoregroup.comas the Server menu entry box value. - Enter
6042as the Server Port menu entry box value. - Check the
Require Certificatecheckbox. - A copy of the Netmore Server Certificate (tc.trust) can be downloaded directly from: Netmore TLS Server Certificate
- Extract the contents from the Certificate, or copy the value below, into the Server Certificate (pem encoding) menu entry box.
| Source file | PEM formatted contents | |
|---|---|---|
| Netmore tc.trust | |
- Select None from the
Gateway Authorizationdrop down menu. - Recommended: select
Publicas the Network Mode. - Click the
Savebutton. - Click the
Apply Changesbutton.
Unsecured LNS URI
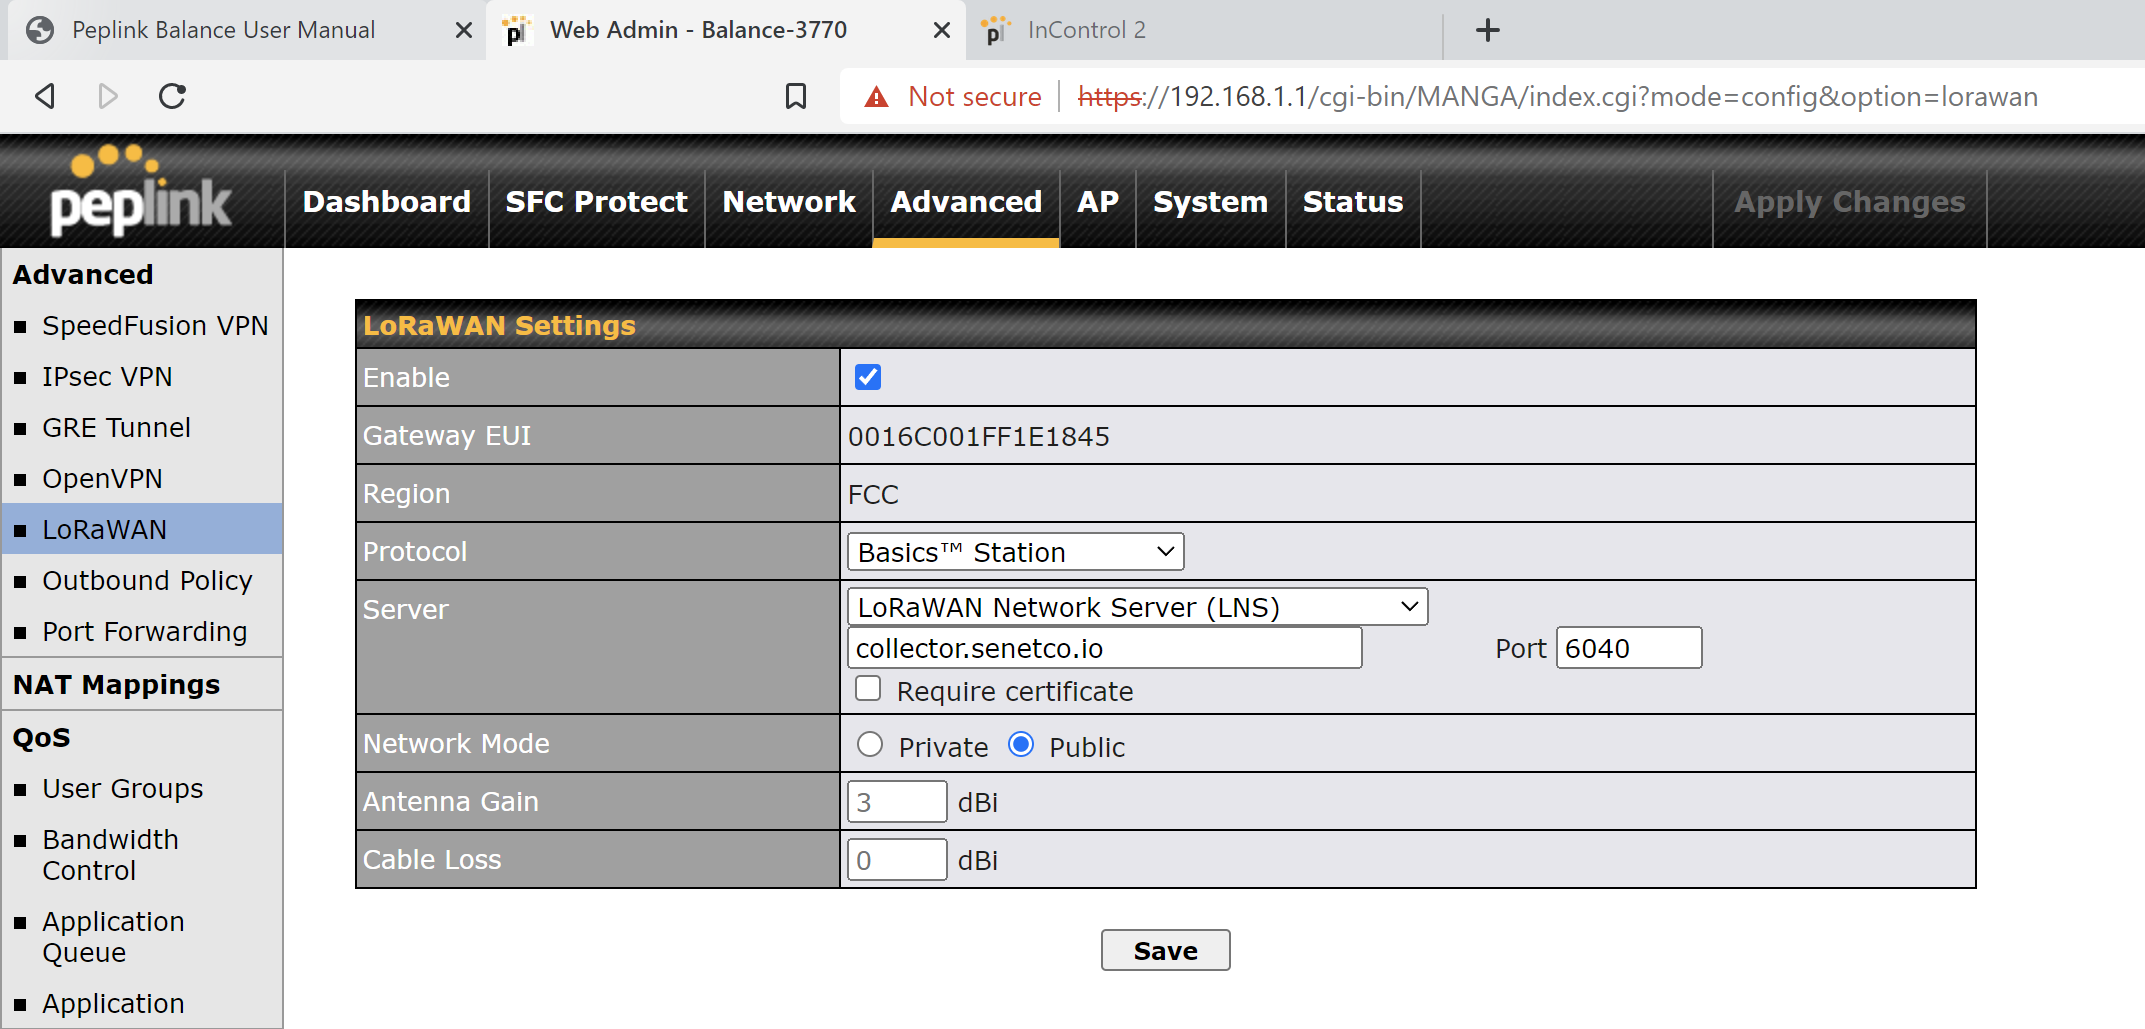
- Check the
Enablecheckbox. - A new section will appear under
LoRaWAN Settings. - Select Basics Station from the
Protocoldrop down menu. - Select
LoRaWAN Network Server (LNS)from the Server drop down menu. - Enter
ns-gw.lns.netmoregroup.comas the Server menu entry box value. - Enter
6040as the Server Port menu entry box value. - Do not check the
Require Certificatecheckbox. - A copy of the Netmore Server Certificate (tc.trust) is not required.
- Recommended: select
Publicas the Network Mode. - Click the
Savebutton. - Click the
Apply Changesbutton.
Verifying Connection to the Netmore Network
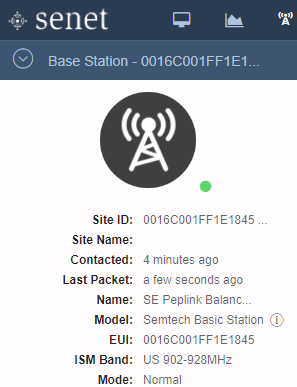
Upon successful completion, the Base Station status will update to Registered - Active when viewed within the Netmore portal, and the status indicator light will turn green.

