Devices
Manage and monitor LoRa enabled Devices on the Senet Network
Device Registration
-
Open the Device registration window.
-
Table View: Click on the add button
 above the Devices table.
 -
Tile View: Click on the add button
 above the tiles and then click Register Device.
-
-
Find the assigned EUI of the Device being registered and enter the 16 hexadecimal characters in the Device EUI field.
Note
If the Device does not have an assigned EUI, one can be obtained by pressing the Senet's EUI Registry link. A unique EUI from Senet will be provided .
-
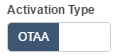
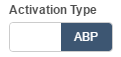
Choose the appropriate Activation Type for the Device.
-
OTAA (Over-The-Air Activation)
Over The Air Activation will provide the application key (AppKey) to provision the Device.
-
ABP (Activation By Personalization)
Activation By Personalization will provide the Device address (DevAddr), network session key (NwkSKey), and application session key (AppSKey) to provision the Device.
-
Device Registration - OTAA
Custom OTAA Registration
If the Device uses a custom Application Key and Join Server, use this registration method.
-
Enter the EUI of the Device or obtain a Device EUI from Senet's EUI Registry.
-
Enter the custom Join Server EUI address in the Join EUI field.
-
Enter the custom Application Key in the Application Key field.
-
(Optional) Enter a Description for the Device.
-
Select the Device Type (default type is Other).
-
Click the Supports Senet Packet check-box if the Device supports the Senet Packet Format.
-
(Optional) Add applicable Device Notes.
-
Click Register New Device when complete.
-
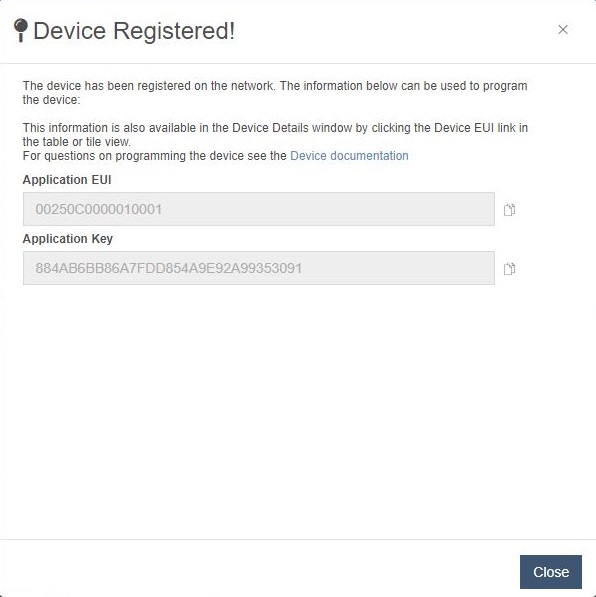
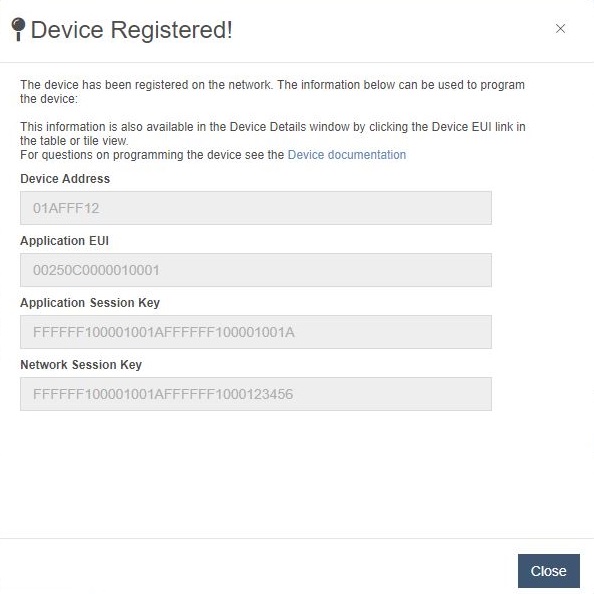
When the Device has successfully registered, the information used to provision the Device will be displayed.
- OTAA (Over-The-Air Activation Custom Keys)

Senet OTAA Registration
-
Select the Senet Allocated Join Information Checkbox to enable this registration mode. This will automatically provide the Join Server EUI and Application Key for the Device.
-
(Optional) Enter a Description for the Device.
-
Select the Device Type (default type is Other).
-
Click the Supports Senet Packet check-box if the Device supports the Senet Packet Format.
-
(Optional) Add applicable Device Notes.
-
Click Register New Device when complete.
-
When the Device has successfully registered, the information used to provision the Device will be displayed.
-
OTAA (Over-The-Air Activation)
-
Device Registration - ABP
Custom ABP Registration
If the Device uses a custom Application Session Key, Network Session Key, and Device Address, use this registration method.
-
Enter the EUI of the Device or obtain a Device EUI from Senet's EUI Registry.
-
Enter the custom Device Address address in the Device Address field. Note: Only NetIDs of 0 or 1 are supported.
-
Enter the custom Application Session Key in the Application Session Key field.
-
Enter the custom Network Session Key in the Network Session Key field.
-
(Optional) Enter a Description for the Device.
-
Select the Device Type (default type is Other).
-
Click the Supports Senet Packet check-box if the Device supports the Senet Packet Format.
-
(Optional) Add applicable Device Notes.
-
Click Register New Device when complete.
-
When the Device has successfully registered, the information used to provision the Device will be displayed.
-
ABP (Activation By Personalization - Custom)
-
Senet ABP Registration
-
Select the Senet Allocated Join Information Checkbox to enable this registration mode. This will automatically generate the Device Address, Application Session Key, and Network Session Key for the Device.
-
(Optional) Enter a Description for the Device.
-
Select the Device Type (default type is Other).
-
Click the Supports Senet Packet check-box if the Device supports the Senet Packet Format.
-
(Optional) Add applicable Device Notes.
-
Click Register New Device when complete.
-
When the Device has successfully registered, the information used to provision the Device will be displayed.
-
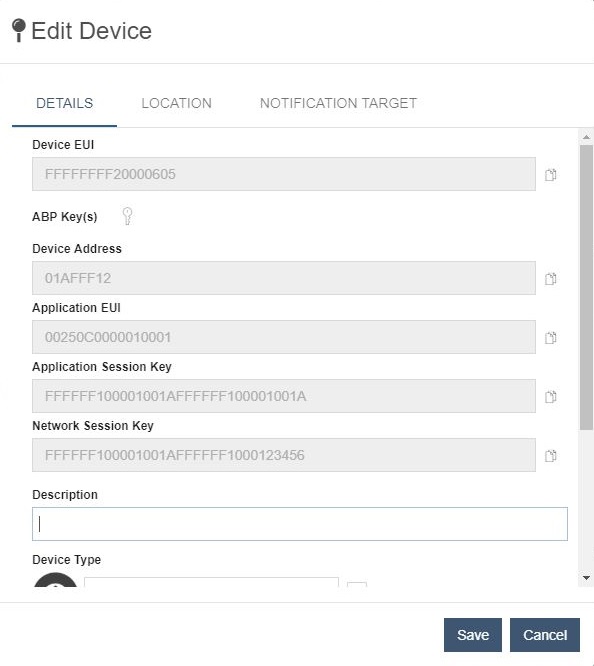
ABP (Activation By Personalization)

-
Device Keys
The Application Key (AppKey) is an AES 128-bit key specific to a Device. The AppKey is used to derive the session keys (NwkSKey and AppSKey) used to encrypt and verify LoRaWAN™ communication and application data.
-
Open the Edit Device window.
-
Table View: Select a row in the Device table. Click on the edit button
 .
. -
Tile View: Click on the menu button
 . Click on the edit button
  .
. -
Device Details: Click on the edit button
 .
.
-
-
Click on the Key button
 to display the Device keys.
-
ABP (Activation By Personalization)
-
OTAA (Over-The-Air Activation)
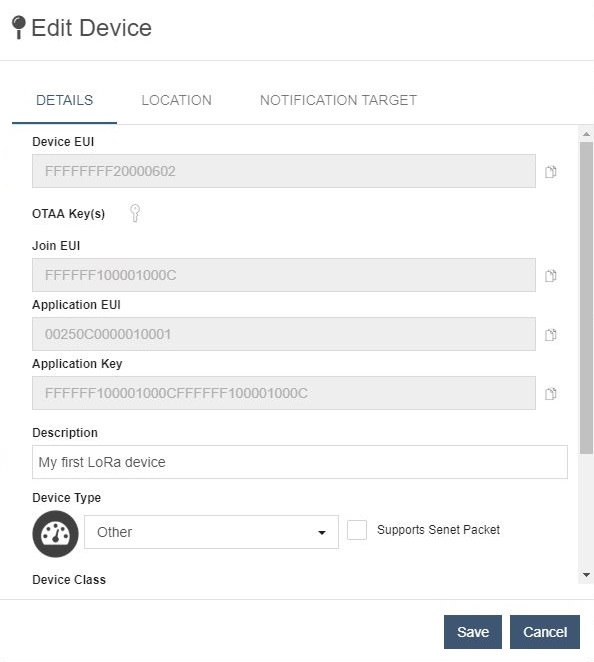
-
Senet Packet Format
A straight-forward, network API for any End Device Application that utilizes LoRaWAN™ communication.
Designed to be extensible for End Devices with multiple sensors and variable application requirements. Each facet of operation has a corresponding packet type, and these in turn provide secure, ‘on demand’ access to the End Device via typed downlinks.
- Operational Status may be solicited:
- Battery Level
- Geo-Location Data (future)
- RF TX & RX Characteristics
- Firmware & Hardware Revisions
- Boot & Reset Event Counts with Reason Code
- Behaviors may be controlled:
- Transmit Interval
- Channel Plan toggle between 8 and 64-Channel operation (LoRaWAN™ shortcut)
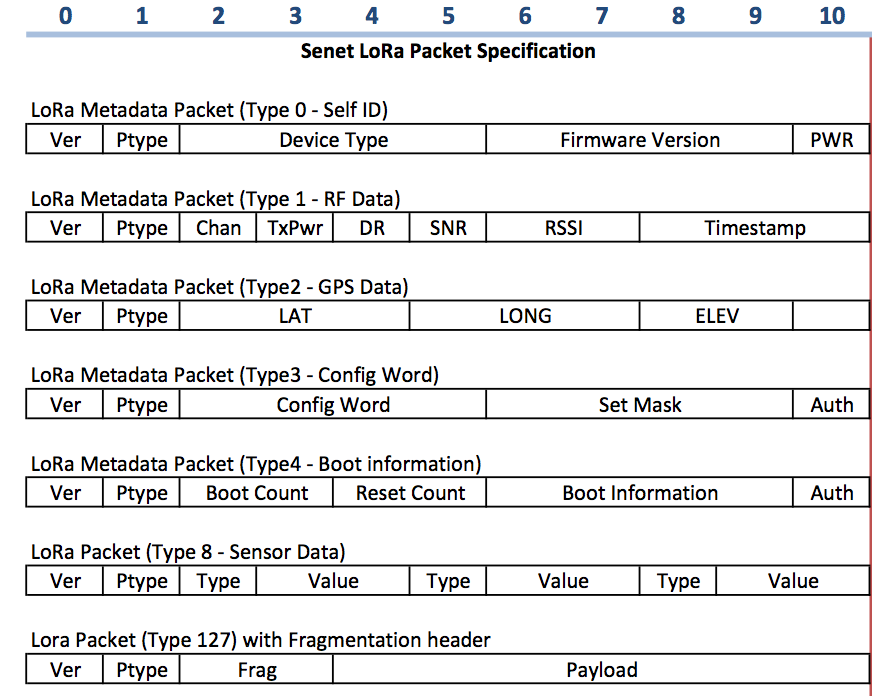
All multi-byte words are encoded MSB..LSB (network-byte-order)
Ver [0..7] Senet Protocol Version: 1
Ptype [8] Fragmented packet (fragment field present when set)
Ptype [9..15] Packet Type (128 values)
Frag [16..31] Optional control field - present when bit [8] is 1
Type [0..7] Describes the type of value following (0..255)
Value [8..23] The value described by Type (0..65535)

Data Rate Reference Table:

Senet also offers decoding of the app payload if the Device implements the standard Senet Packet Format. If the "Supports Senet Packet" box is checked on the Device Details Edit Dialog then the following optional JSON fields will be appended to the message.
Fields
| Packet Type | FieldName | DataType | Category | Description |
|---|---|---|---|---|
| 0 - Self ID | deviceModel | String | Optional | Model or Device Type of the Device |
| deviceRev | Number | Optional | Hardware revision | |
| fwVersion | String | Optional | Firmware Version | |
| fwDeveloper | Number | Optional | Identifier of how the firmware was built | |
| batteryStatus | Number | Optional | Battery level 0-7, with 0 being empty and 7 being full | |
| 1 - Rx Info | uplinkChan | String | Optional | Channel transmitted on |
| downlinkSnr | String | Optional | SNR of the last frame received | |
| downlinkRssi | String | Optional | RSSI of the last frame received | |
| uplinkTxPwr | String | Optional | Transmit power used | |
| uplinkDatarate | String | Optional | Datarate used | |
| localTimestamp | String | Optional | Current timestamp (count of transmitted packets for rev 01.01.xx.xxxx) | |
| 2 - GPS Data | lat | Number | Optional | Decimal Latitude |
| lng | Number | Optional | Decimal Longitude | |
| elev | Number | Optional | Elevation in meters | |
| uplinkTxPwr | Number | Optional | Transmit power used (if available) | |
| 3 - ConfigWord | configWord | String | Optional | Configuration Data |
| configMask | String | Optional | Mask applied to configWord | |
| txPeriod | Number | Optional | Transmission Period (0-5) | |
| 4 - Boot Info | bootCount | Number | Optional | Number of times the Device has booted |
| resetCount | Number | Optional | Number of time the Device has reset | |
| bootInfo | String | Optional | Reason or ID for the last boot | |
| 8 - Sensor Info | value1 | Number | Optional | Sensor value |
| value2 | Number | Optional | Sensor value (if available) | |
| value3 | Number | Optional | Sensor value (if available) | |
| value4 | Number | Optional | Sensor value (if available) | |
| value5 | Number | Optional | Sensor value (if available) |
Device Configuration
MultiTech xDot
Connecting MultiTech xDot Device to the Senet Network
-
Register the Device in the Portal by following the Device Registration procedure.
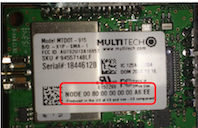
The Device EUI should be located on the Device. Look for characters in the format similar to:
NODE: 0080000000XXXXXX -
Obtain the App key displayed at the end of the registration process.
Note
The App key is ONLY displayed during the registration process.
-
Configure the xDot Device to connect to the Senet Network with the following AT commands:
Configure for Public Network
AT+PN=1

Configure Frequency Sub-band (1:902.3-903.7, 2:903.9-905.3,..., 8:913.5-914.9)
AT+FSB=1 (note: in areas where there are 64-channel GWs, better to use FSB=0)

Set your App EUI to the Senet Developer Application EUI
AT+NI=0,00:25:0C:00:00:01:00:01

Set Application Key (from the Developer Portal Device Setup window - this is unique per Device)
AT+NK=0,<APP-KEY>

Set transmit data rate
AT+TXDR=10

Set transmit power
AT+TXP=20

Set antenna gain
AT+ANT=0

Set Over-The-Air Join mode
AT+NJM=1

Save configuration
AT&W

View configuration
AT&V

For newer xDots, also need to add:
Set the Join Delay to 5 seconds
AT+JD=5